Save indexed data to local CSV files
Objective
This tutorial describes how to use the Subsquid indexing framework for saving processed blockchain data to local CSV files. The intent is to show how Subsquid SDK can be used for data analytics prototyping.
File-based data formats like CSV are convenient for data analysis, especially in the early prototyping stages. This convenience motivated Subsquid Team to develop some extensions to allow saving processed data to file-based storage.
We chose MATIC transactions on Ethereum mainnet for this example. This selection provides enough data to highlight the performance of the Subsquid framework and is interesting from a data analysis standpoint.
An article about this demo project has been published on Medium. The project source code can be found in the local-csv-indexing repository.
As of 2023-12-17, the local-csv-indexing repo is mostly still sound, but already somewhat outdated. You can take a look at the less sophisticated, yet regularly updated example here.
Pre-requisites
- Subsquid CLI
- (optional) Python
Setup
Let's start by creating a new blockchain indexer, or "squid" in Subsquid terminology. In a terminal, launch this command:
sqd init local-csv-indexing -t evm
Here, local-csv-indexing is the name of the project, and can be changed to anything else. The -t evm option specifies that the evm template should be used as a starting point.
Note: The template actually has more than what we need for this project. Unnecessary packages have been removed in the tutorial repository. You can grab package.json from there to do the same.
Files-wise, docker-compose.yml, schema.graphql and squid.yaml were removed. commands.json, the list of local sqd scripts, has been significantly shortened (here is the updated version).
ERC-20 token ABI
To be able to index transfers of a token, it's necessary to know the address and the ABI (Application Binary Interface) of the token contract. The ABI defines the contract's functions and events, including their typed inputs and outputs.
Luckily, both of these can be found on block explorers like Etherscan.
The indexer needs the ABI for locating the contract events or functions in the EVM execution trace and decoding their inputs. Subsquid SDK has a handy command to generate some boilerplate TypeScript code to achieve this:
npx squid-evm-typegen src/abi 0x7D1AfA7B718fb893dB30A3aBc0Cfc608AaCfeBB0#matic
The typegen tool uses Etherscan API to fetch the contract ABI. Other compatible APIs are supported via the --etherscan-api flag. For example, if the contract was deployed to Polygon and its ABI was available from Polygonscan, it could still be fetched with the same command extended with --etherscan-api https://api.polygonscan.io.
Alternatilvely, the same command can be used with a path (local or URL) to a JSON ABI in place of the contract address.
This will generate some files under the src/abi folder, the most interesting of which is matic.ts.
CSV, Tables and Databases
For writing local CSVs we will need the file-store-csv package:
npm i @subsquid/file-store-csv
Packages are also available for writing to parquet files and for uploading to S3-compatible cloud services.
Next, let's create a new file at src/tables.ts. This is where it's possible to provide filenames for the CSV files, as well as configure their data structure, in much the same way as if they were a database table (the class name is no coincidence):
import {Table, Column, Types} from '@subsquid/file-store-csv'

export const Transfers = new Table(
  'transfers.csv',
  {
    blockNumber: Column(Types.Numeric()),
    timestamp: Column(Types.DateTime()),
    contractAddress: Column(Types.String()),
    from: Column(Types.String()),
    to: Column(Types.String()),
    amount: Column(Types.Numeric()),
  },
  {
    header: false,
  }
)
Let's create another file next, this time named src/db.ts, to configure the data abstraction layer. Here we export an instance of the Database class implementation from the file-store package (a dependency of file-store-csv). We will use this instance in much the same way as we would use a TypeormDatabase instance in a PostgreSQL-based squid.
import {Database, LocalDest, Store} from '@subsquid/file-store'
import { Transfers } from './tables'

export const db = new Database({
  tables: {
    Transfers,
  },
  dest: new LocalDest('./data'),
  chunkSizeMb: 100
})
Note the chunkSizeMb option. A new chunk (that is, a new folder with a new CSV file in it) will be written when either the amount of data stored in the processor buffer exceeds chunkSizeMb, or at the end of the batch during which ctx.store.setForceFlush() was called.
Data indexing
All the indexing logic is defined in src/processor.ts, so let's open it and edit the EvmBatchProcessor class configuration. We should request data for the right smart contract and the right EVM event log:
export const contractAddress =
  '0x7D1AfA7B718fb893dB30A3aBc0Cfc608AaCfeBB0'.toLowerCase();

const processor = new EvmBatchProcessor()
  .setGateway('https://v2.archive.subsquid.io/network/ethereum-mainnet')
  .setRpcEndpoint({
    url: process.env.RPC_ENDPOINT,
    rateLimit: 10
  })
  .setFinalityConfirmation(75)
  .addLog({
    address: [contractAddress],
    topic0: [events.Transfer.topic]
  });
Note: the RPC_ENDPOINT environment variable is used, so make sure to edit the .env file and use a valid URL of an Ethereum RPC node, e.g.:
DB_NAME=squid
DB_PORT=23798
GQL_PORT=4350
# JSON-RPC node endpoint, both wss and https endpoints are accepted
RPC_ENDPOINT="<eth_rpc_endpoint_url>"
Let's define the logic to process a batch of EVM log data, and save it to CSV files.
A double loop is necessary to explore all the blocks in each batch and the logs in each block. The processor provides no guarantees that it won't provide any data not matching the filters, so it's necessary to check that the logs have been generated by the right address and that they have the right topic signature.
It's then possible to decode the events and prepare objects with the right data structure, which are then written to the Transfers CSV file.
Here is a short summary of the logic:
processor.run(db, async (ctx) => {
  let decimals = 18
  for (let block of ctx.blocks) {
    for (let log of block.logs) {
      if (log.address !== contractAddress) continue;
      if (log.topic0 !== events.Transfer.topic) continue;

      const { from, to, value } = events.Transfer.decode(log);

      ctx.store.Transfers.write(({
        blockNumber: block.header.height,
        timestamp: new Date(block.header.timestamp),
        contractAddress: log.address,
        from: from.toLowerCase(),
        to: to.toLowerCase(),
        amount: BigDecimal(value.toBigInt(), decimals).toNumber(),
      });
    }
  }
});
The file in the GitHub repository is slightly different, as there's some added logic to obtain the number of decimals for the token. For that, the processor interacts with the smart contract deployed on chain.
Launch the project
Build, then launch the project with
npm run build
node -r dotenv/config lib/main.js
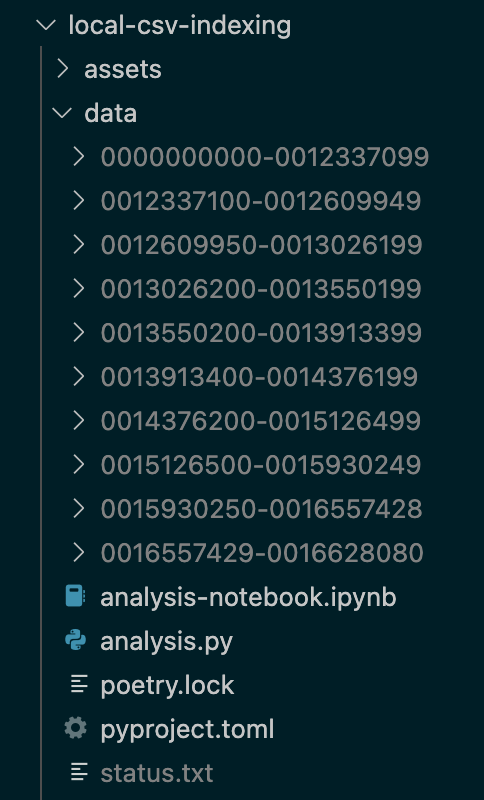
And in a few minutes, a few sub-folders (whose names are the block ranges where the data is coming from) should be created under the data directory, each containing a transfer.csv file.
Data analysis with Python
If you want to learn how to analyze this data using Python and Pandas, refer to the Medium article dedicated to this demo project, or consult the project's repository on GitHub.
Conclusions
The purpose of this project was to demonstrate how to use Subsquid's indexing framework for data analytics prototyping: the indexer was able to ingest all this data, process it, and dump it to local CSV files in roughly 20 minutes (figure out of date). The simple Python script in the project's repository shows how to read multiple CSV files, and perform some data analysis with Pandas.
Subsquid Team seeks feedback on this new tool. If you want to share any thoughts or have any suggestions, feel free to reach out to us at the SquidDevs Telegram channel.